How to Change a Table Saw Blade
As a craftsman or DIY worker, there will be tons of things you can craft with a table saw and all of these things are only going to be possible if the blade of the saw is in a good mode. Otherwise, you will fall short on all the potential goals you can achieve.
Speaking of achieving cutting goals, a table saw can precisely rip almost anything within a few seconds. However, to get the optimal performance, you must get rid of the blade drift issue. That’s why you need to alter the blade from time to time.
Interested in knowing how to change a table saw blade? Then scroll down further and learn!
Changing a Saw Blade in 7 Steps
Since the table saw blades lose sharpness after a certain amount of use, you have to replace them with other table saw blades. Otherwise, it will produce sloppy work or in the worst-case scenario, it gets stuck frequently.
Below we have described the procedure of removing and reinstalling a budget table saw’s blade. So, stay tuned…
Step 01: Removing the blade plate and guard
Whenever dealing with any power tool which is connected to electricity, the first and foremost thing on agenda has to be disconnecting the power. Table saws are dangerous that’s why precaution is a must and it has to be ensured that your cutter is not connected to the electricity while changing the blades.
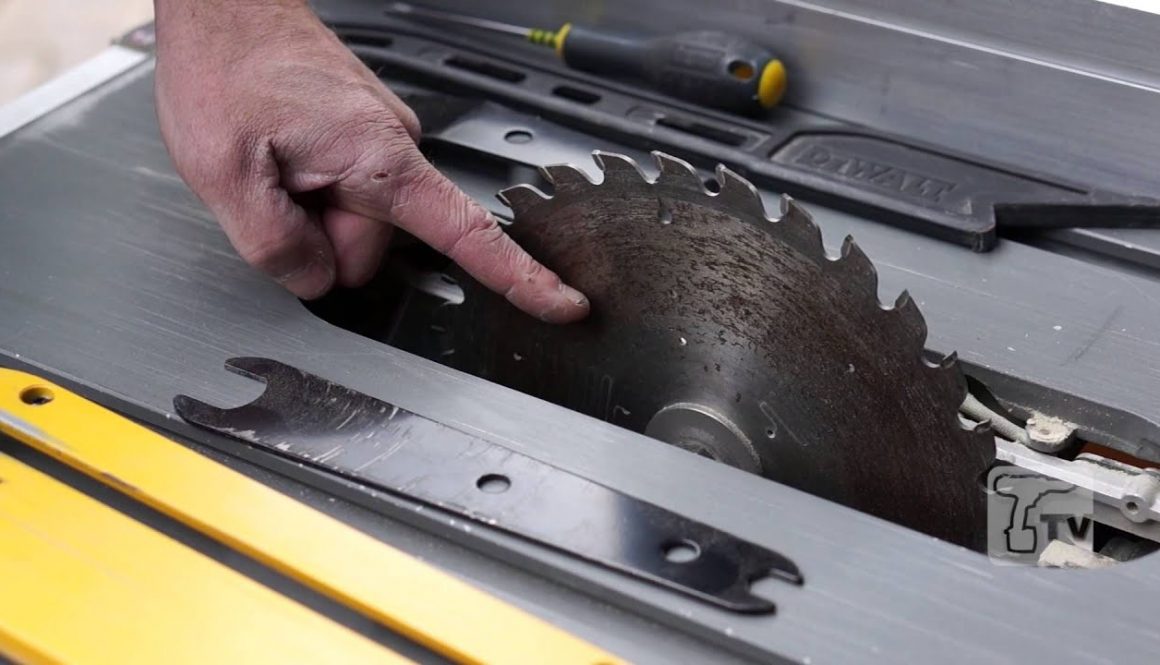
After disconnecting from the power, you should remove the blade plate and blade guard. A blade plate is a metal plate placed on the surface of the table surrounding the blade. Most models of saws have 2 screws to keep them tight and secure in their place.
So, in order to remove the plate, the screws have to be loosened first. The instruction manual which comes with the table saw has detailed instructions on how to remove the screws and the plate. Now you can remove the blade guard easily.
Step 02: Uphold the saw blade
Now, the blade guard is removed and the blade is exposed. In this step, raising the blade to its maximum height will make it easier to remove. When mounting, you need to be very cautious about how to hold the blade otherwise it could lead to a horrible injury.
Step 03: Removing the arbor nut
Arbor is a unit that holds the blade steadily in place. So, at first, the nut has to be loosened to take out the blade. When purchasing a table saw, a set of wrenches are also provided with it. Use one of the wrenches to hold the blade and another wrench to loosen the arbor nut.
After the arbor nut is fully loosened, use your hands to slide the nut out. Once you have removed the arbor nut, take out the washer and set it aside.
Step 04: Replacing the blade
At this point, the blade is exposed and ready to be detached. Hold the blade firmly and slowly slide it out. Now, the new blade is ready to mount. Be careful when mounting the new blade.
Step 05: Insert the washer and arbor nut
Now that the blade has been changed, it is time to put back the washer and arbor nut. After placing the arbor nut and washer, it has to be tightened the similar way it was loosened. One wrench holds the blade while the other wrench tightens it. Make sure that the nut and washer are attached firmly.
Step 06: Placing the blade plate and guard
When the arbor is in place, it’s time to adjust the blade plate. Place the plate in the same position from where it was taken out. If you place it properly, the plate will make a clicking noise.
That’s it; now add the blade guard and you are done.
Step 07: Turn on the power
Since the new blade installation is complete, the table saw is ready to deliver its best. Finally, plug the device to a power source and check whether the blade is rotating flawlessly or not. If the table saw or the blade shows abnormal activities, then carefully recheck the previous steps again.
Table saw wrench substitutes
The table saw wrenches are an important part of changing the table saw blade and if you don’t have a pair or simply lost it, there are some alternatives that you can use so that you don’t have to put your precious hands into jeopardy.
- An adjustable wrench: These are common and found almost everywhere.
- Open-ended wrench: Another handy alternative in case an adjustable wrench isn’t found. These can get the job done.
- A wooden block: In case you have only one wrench, you can use a wooden block by wedging it to the blade’s teeth to stop it from moving and use the wrench to remove the nut.
- Blade lock: Modern saws allow installation of a blade lock, a device to hold the blade in place. The process is simple so you just need to lock the blade to stop moving and use the wrench to remove the nut. This method protects your hands from being injured.
- Arbor lock: Modern saws also a function called arbor lock. It has a switch that can stop the blade from moving when loosening the arbor nut. It is also a good and safe option when removing the nut.
Safety
It is time to talk about the most important issue out of all, ensuring your safety. Below we suggest few safety tips to keep you out of harm’s way.
- Don’t touch the plug with wet hands as this is a common thing many people carelessly forget and fall in danger.
- Wear gloves. Get one of the good cut resistant ones, befitting of a woodworker. And, never touch the blade with bare hands
- When placing the new blade make sure it’s edges are pointing towards you, otherwise, it won’t fix properly.
- The washer should have the conclave side towards the blade to keep it tightly mounted.
- Always keep focus, getting absent-minded, or losing concentration just for a second can put you in danger. Don’t take your safety for granted.
Conclusion
Now that you know how to change a table saw blade, you can do it by yourself and save your money.
I believe, after reading this article, it should be an easy task for you. Good luck with the woodworking and keep your hands safe!


